Table of Contents
According to expert glaziers in Sydney, you can easily tighten any old, drafty windows by fixing new putty. Single pane glass windows last many years when well maintained.

Know how you can preserve and maintain your windows by keeping them free of draft. All you need to do is to replace old or damaged glazing putty. Here are the steps you should follow:
Step 1: Removing Old Glazing Putty from the Window
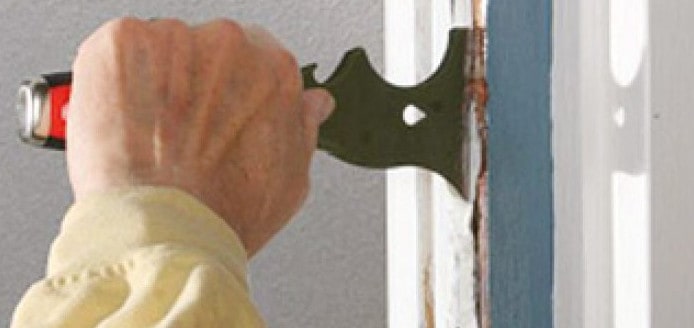
Use a sturdy putty knife to pry out any loose pieces of the old putty. Soften the hard to remove putty with an appropriate heat gun. Then scrape the glazing putty away.
In older single-paned windows, glazing is typically surrounded by a form of putty compound that holds the pane in place.

It also assists in sealing out weather elements. Although putty may last for decades, it can get rock-hard with time, thus cracking and falling off. Missing or loose putty allows rainwater and wind to leak around the pane.
Removing old putty and replacing putty on one glass pane can take 15 to 60 minutes. This will depend on the dimensions of the glass pane and how easy it is to remove old putty.
This is also a great time to replace any broken glass when replacing putty. Replacing broken glass will only add some few dollars to the work and it will be cheaper than hiring a glass installation or repair service.
You can actually replace a glass pane and putty while the window is in place. However, you can save more time and still get more impressive results by removing the window.
This will be followed by clamping it on a debris-free and flat surface when replacing glass and glazing putty. If there’s any broken glass, first remove it before removing the old or damaged putty.
You should wear eye protection and heavy gloves while working with broken glass. You can cover the broken glass with a cloth. Then tap it carefully using a hammer.
This way, tiny pieces of glass will not fly away while hitting the glass. Once you have broken the glass, pull off the shards with your hand.
You can remove old or damaged glazing points using a set of pliers. In case the glass is still in good condition, then you don’t need to replace it.
Upon removing broken glass, you can go ahead and remove the old window putty. In case the glazing putty is excessively cracked, then you’ll be able to remove larger pieces easily and quickly.
Putty in its best condition may take more time to remove. Heating it will make it softer and thus easier to remove with a strong putty knife.
You should wear heavy gloves to keep your hands protected from burns. Also, be careful when using any type of heat gun on your windows.
Avoid putting heat one spot since it may crack the pane. If the heat gun does not come with some form of heat shield, then you may use a sheet of metal to keep the glass protected while heating the putty.
Once you’re done removing the putty, you should add a coating of a primer on the bare wood. A shellac primer will be the best primer to use since it dries quickly.
Step 2: Replacing Glass and Glazing Putty
Start with setting the new pane on latex caulk. Then press the glazing points in place on the wood frame every 8 inches.
Allow excess caulk (caulk oozing out beneath the glass) to harden and cut it off later on with a sharp utility knife.
Whenever you want to get new glass, you should start by measuring the window opening and subtract an eighth inch from the dimensions you get.

These measurements will be used when cutting new glass at a glass hardware store. You can take a piece of the older glass to the store to get a pane with the same thickness.
You can also buy some new glazing points for holding the pane in place as the new putty hardens. You can find a glazing compound in acrylic/latex and oil-based options. Latex products are often packed in a form of a tube and last longer.
Also, you’ll wait for long before painting the putty. On the contrary, oil-based glazing putty requires waiting for more days before painting.
On the same note, oil-based options should be allowed to dry completely before you smoothen them. If smooth and neat results are your priority, then go for oil-based options.
When installing new glass, start with laying a compound of light bead in the frame. You’ll set the pane on this bead.
This works best with any soft latex putty. However, if you’re setting the glass with oil-based putty, then you should use a bead of latex/acrylic caulk.
You’ll set the pane on the caulk and wiggle it while pressing to ensure the compounds embeds the glass firmly. This will be followed by applying putty on the glass along the frame.
Upon applying putty, you will need to smoothen it. It’s easier to apply oil-based glazing putty while in a warm state. You can heat putty by setting the can it came with inside a bowl with hot water.
You only need to do this for some few minutes. You should avoid touching putty after smoothening since it takes a couple of days to dry.
You’ll need to wait for more days before applying a prime. You can check the instructions label on the can for the recommended wait time.
Mitered Moldings- A Great Alternative to Glazing Putty
Applying putty and making it smooth is time-consuming. Thus, when you need an easier option to work with that looks even better than putty, then you can use wood molding to hold the glass onto the frame instead of putty.
Most window frames only require a quarter inch of wood molding.
All you’ll need to do is set the glass pane on a bead of a latex-based caulk. You’ll not require any glazing points. Simply use a hammer and drive in some tiny brads.
Do this carefully to avoid any damage. You can also use a brad nailer to shoot the brads into place. The safest way would be using an appropriate brad pusher. This is a tool consisting of a piston that6 slides in a metallic tubing.
To use the tool, you’ll put a single brad into the tubing, then push its handle. The piston will push the set brad into the wooden frame.
However, most local hardware stores don’t stock brad pushers. Nevertheless, you can easily find a brad pusher on online or from a woodworker supply store.
Tools Required for the Project
You should have all the required tools for the DIY window glazing project before starting. By have all the right tools, you’ll avoid frustration and save time. The tools needed include:
- Heat gun
- Utility knife
- Putty knife
Materials Required for the Project
You can easily avoid a last-minute rush to local stores by having the necessary materials ready before this DIY glazing project. The materials required include:
- Glazing putty (latex or oil based)
- Latex caulk
- Glass panes (if necessary)
- Glazing points


